Trailer light wiring is essential for safety and legal compliance, ensuring proper communication between your vehicle and trailer․ This guide provides a comprehensive overview to help you understand and install trailer lighting systems effectively․
Understanding the Basics of Trailer Lighting Systems
Trailer lighting systems are designed to ensure safety and visibility when towing․ They typically include brake lights, turn signals, tail lights, and marker lights․ These components communicate your vehicle’s movements to other drivers․ The system relies on a wiring harness that connects your vehicle’s electrical system to the trailer․ Proper wiring ensures all lights function synchronously with your vehicle’s signals․ A good ground connection is crucial for reliable operation, as it completes the electrical circuit․ Understanding wire color coding is also essential, as each color corresponds to a specific function (e․g․, green for right turn/stop, yellow for left turn/stop)․ Regular testing and maintenance are vital to avoid issues like faulty connections or corrosion․ Always use a circuit tester to verify connections before towing․
Components of a Trailer Wiring System
A trailer wiring system includes a wiring harness, trailer plugs, connectors, lights, and a converter․ These components ensure proper electrical connections for safe and reliable operation․
Types of Trailer Plugs and Their Uses
Trailer plugs come in various configurations to meet different towing needs․ The 4-pin plug is the most common, supporting basic functions like tail lights and brake lights․ The 5-pin adds a connection for auxiliary power, while the 6-pin includes a dedicated circuit for electric brakes․ The 7-pin plug is the most versatile, accommodating all functions, including reverse lights and auxiliary power․ Heavy-duty applications often use the 13-pin plug, which supports advanced features like trailer brakes and refrigeration units․ Each plug type is designed for specific trailer requirements, ensuring safe and reliable electrical connections between the vehicle and trailer․
Understanding Wire Colors and Their Functions
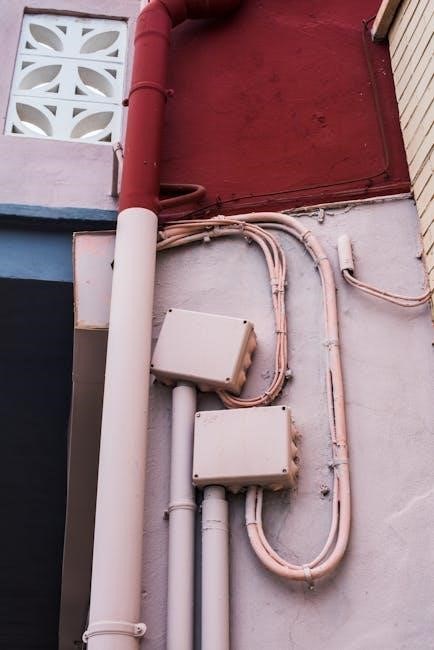
Trailer wiring systems use color-coded wires to simplify installation and troubleshooting․ The white wire is typically the ground connection, essential for proper system operation․ Brown wires power the tail lights, activating when the vehicle’s headlights are on․ Yellow wires handle the left turn signal and brake light, while green wires manage the right turn signal and brake light․ Red wires often control auxiliary functions like brake controllers or additional lights․ Blue wires are reserved for electric brakes, ensuring safe stopping․ Understanding these color codes is crucial for connecting components correctly․ Always consult a wiring diagram specific to your vehicle and trailer, as variations may occur․ A reliable ground connection is vital for all functions to work seamlessly․
Importance of a Good Ground Connection
A reliable ground connection is the backbone of any trailer wiring system, ensuring proper operation of all lights and electrical components․ Without a solid ground, signals from the vehicle to the trailer can be interrupted, leading to malfunctioning lights or brakes․ Corrosion, dirt, or loose connections are common culprits behind ground-related issues․ Always start troubleshooting by verifying the ground connection, as it is often the root cause of problems․ A clean, secure ground point on both the vehicle and trailer is essential․ Regularly inspect and maintain these connections to prevent failures․ A good ground ensures safety and reliability, making it a critical aspect of trailer wiring maintenance and installation․

Tools and Materials Needed for Trailer Wiring
Essential tools include a multimeter, wire strippers, and crimping pliers․ Materials like connectors, heat-shrink tubing, and assorted wires ensure safe, durable, and reliable electrical connections for your trailer․
Essential Tools for a Successful Wiring Project
Having the right tools ensures a smooth and efficient trailer wiring project․ A multimeter is crucial for testing voltage and connections․ Wire strippers are necessary for preparing wires, while crimping pliers secure connections effectively․ A circuit tester helps verify wiring accuracy․ Soldering irons are optional but provide durable connections․ Heat-shrink tubing protects wires from damage, and electrical tape offers additional insulation․ A wiring diagram is indispensable for guidance․ Ensure you have assorted connectors and adapters to match your vehicle and trailer plugs․ Proper tools and materials prevent errors and ensure safety, making your trailer wiring project reliable and long-lasting․
Recommended Materials for Durable Connections
For reliable and long-lasting trailer wiring, use high-quality materials designed to withstand harsh conditions․ Marine-grade wires are ideal due to their resistance to moisture and corrosion․ Ensure wires are appropriately gauged for the power demands of your trailer lights and accessories․ Heat-shrink tubing is essential for insulating connections, while epoxy-filled connectors provide superior protection against the elements․ Consider using adhesive-lined connectors for added sealing․ A ground fault circuit interrupter (GFCI) can enhance safety by preventing electrical shocks․ Investing in durable materials ensures consistent performance, minimizes the risk of electrical failures, and extends the lifespan of your trailer wiring system․
Step-by-Step Guide to Wiring Trailer Lights
This guide provides a detailed, straightforward approach to wiring trailer lights, covering preparation, harness installation, light testing, and safety protocols for a secure and functional setup․
Preparation and Safety Tips
Before starting your trailer wiring project, ensure you have all necessary tools and materials․ Always disconnect the battery to prevent electrical shocks․ Inspect the wiring harness for damage and test connections with a circuit tester․ Secure loose wires to avoid abrasion and ensure proper grounding․ Protect wiring from moisture by sealing connections with waterproof connectors or tape․ Consult a wiring diagram specific to your vehicle and trailer setup․ Turn on lights and test functions while wiring to verify correctness․ Never overload circuits, and keep flammable materials away․ Safety glasses and gloves are recommended․ Proper preparation ensures a safe and reliable wiring installation․
Connecting the Wiring Harness to Your Vehicle
Connecting the wiring harness to your vehicle requires careful matching of the vehicle’s wiring system to the trailer’s wiring․ Start by identifying the correct trailer plug type (4-pin, 7-pin, or 13-pin) for your setup․ Use a wiring diagram specific to your vehicle make and model to locate the appropriate wiring ports․ Connect the ground wire to a clean, bare metal surface on the vehicle frame to ensure a solid ground connection․ Use a circuit tester to verify signal output for brake, turn, and tail lights․ Secure all connections with heat-resistant tape or connectors to prevent damage․ Avoid splicing into existing vehicle wires unless necessary, and always follow manufacturer guidelines for adapters or converters․ Properly routing and securing the harness prevents damage and ensures reliable operation․
Installing and Testing Trailer Lights
Installing trailer lights involves mounting the light assemblies securely and connecting them to the trailer wiring․ Ensure each light is positioned to meet legal visibility requirements․ Use durable fasteners and weatherproof connectors to protect against moisture and vibrations․ After installation, test each light function (tail, brake, turn, and reverse) by activating them on the vehicle․ Use a multimeter or circuit tester to verify power at each connection․ Check for proper grounding to prevent dimming or malfunctioning lights․ Test the trailer lights while connected to the vehicle to ensure synchronization․ If issues arise, inspect for loose connections, corroded terminals, or damaged wires․ Proper testing ensures safety and compliance with regulations․ Regular maintenance is recommended to maintain functionality and reliability․

Troubleshooting Common Trailer Lighting Issues
Common issues include faulty ground connections, corroded plugs, or damaged wires․ Use a circuit tester to identify problems and ensure all connections are clean and secure․
Identifying and Fixing Ground Connection Problems
Ground connection issues are a common cause of trailer light malfunctions․ To diagnose, check for corrosion or damage at the grounding points․ Ensure the ground wire is securely attached to a clean, metal surface on both the vehicle and trailer․ If the lights flicker or fail, test the ground connection with a multimeter․ Clean or replace corroded terminals and tighten loose connections․ Proper grounding ensures consistent power flow and reliable operation of lights, brakes, and auxiliary systems․ Always verify the ground connection before testing other components, as it is often the root of electrical issues in trailer wiring systems․ A good ground is essential for safety and functionality․
Diagnosing Faulty Wires and Connections
Diagnosing faulty wires and connections is critical for ensuring your trailer lighting system functions properly․ Start by using a multimeter or circuit tester to identify breaks or shorts in the wiring․ Check for corrosion, frays, or damage to the wires, as these can disrupt the electrical flow․ Test each connection point, including the trailer plug and sockets, to ensure they are clean and secure․ If a wire is damaged, repair or replace it with the appropriate gauge wire․ Loose or corroded connections can often be resolved by cleaning and tightening them․ Always verify the continuity of the circuit to confirm the issue is resolved․ Faulty wires and connections can cause intermittent or complete loss of lighting, so thorough testing is essential for reliable operation․
Advanced Topics in Trailer Wiring
Explore advanced trailer wiring techniques, including brake controllers, auxiliary power systems, and custom configurations․ These systems enhance functionality and safety for specialized trailer setups and needs․
Understanding Brake Controller Wiring
Brake controller wiring is crucial for trailers with electric brakes, ensuring safe and controlled stopping․ The controller connects to your vehicle’s brake system, synchronizing trailer brakes with your vehicle’s brakes․ Typically, a brake controller requires a dedicated wiring harness and a 7-pin connector․ The black wire is for the 12V power supply, while the blue wire connects to the trailer’s brake system; Proper installation ensures seamless communication between your vehicle and trailer brakes, enhancing safety on the road․ Always refer to your vehicle’s manual and the controller’s instructions for specific wiring requirements, and test the system thoroughly before towing․

Adding Auxiliary Power to Your Trailer
Auxiliary power allows you to provide electrical energy to your trailer, enabling features like interior lights, refrigerators, or charging systems․ This is typically achieved through a 7-pin trailer connector, which includes a dedicated wire for auxiliary power․ To set this up, connect the auxiliary wire to your vehicle’s battery via a fuse box and relay, ensuring a safe and consistent power supply․ Always use proper wiring techniques and test the system to avoid electrical issues․ Auxiliary power enhances functionality and comfort, making it ideal for trailers with additional electrical needs․
Proper trailer light wiring ensures safety and compliance․ By following guidelines and maintaining connections, you can confidently tow, knowing your setup is reliable and secure for all conditions․
Best Practices for Maintaining Trailer Wiring
Regular inspection and testing of trailer wiring are crucial for ensuring reliability and safety․ Always use a circuit tester to verify connections and identify potential issues before towing․ Protect wires from moisture by sealing connectors and routing them away from exposure to water․ Ensure a solid ground connection, as it is essential for proper light function․ Avoid overloading circuits and use high-quality materials to prevent corrosion․ Perform seasonal inspections to check for wear, damage, or corrosion․ Store trailers in a dry environment when not in use to prevent wiring deterioration․ By following these practices, you can extend the life of your trailer wiring and ensure consistent performance․