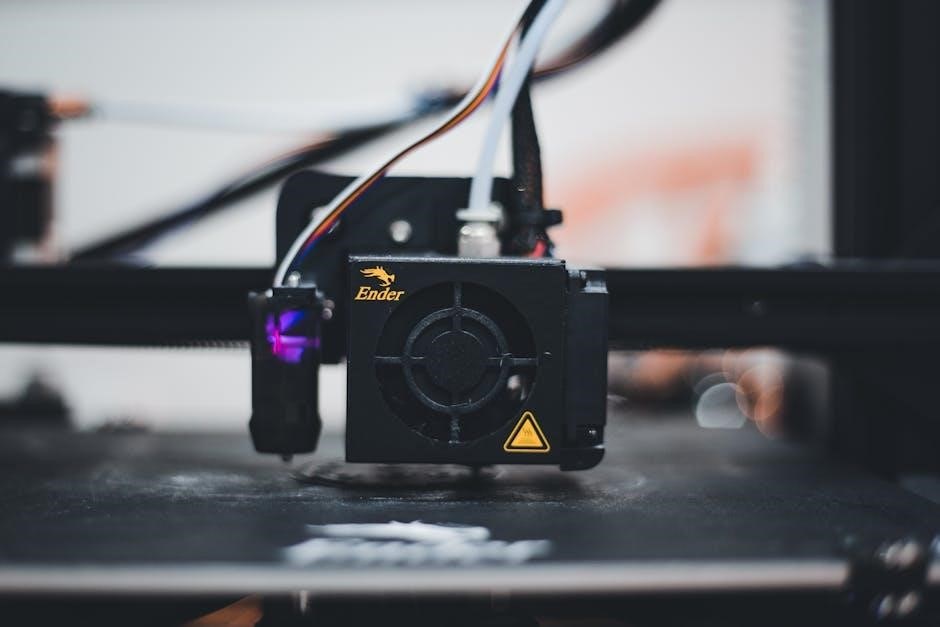
Welcome to the Ender 3 Filament Guide, your comprehensive resource for optimizing filament usage with the Creality Ender 3 series. This guide covers essential tips, troubleshooting, and best practices to enhance your 3D printing experience. Whether you’re a beginner or an advanced user, this guide will help you maximize the potential of your Ender 3 printer.
1.1 Overview of the Ender 3 Printer
The Creality Ender 3 is a highly popular and affordable 3D printer known for its excellent build quality and versatility. As part of the Ender series, it offers a robust open-frame design, making it a favorite among hobbyists and professionals alike. The printer supports a wide range of filaments and is compatible with various upgrades, such as direct drive systems and custom firmware. Its ease of use and strong community support make it an ideal choice for both beginners and experienced users looking to enhance their 3D printing capabilities.
1.2 Importance of Filament in 3D Printing
Filament is the core material in 3D printing, directly affecting print quality and functionality. Its type and quality determine the mechanical properties, durability, and aesthetics of the final product. Choosing the right filament ensures compatibility with the printer and prevents issues like jamming or warping. Understanding filament characteristics is essential for achieving successful prints and optimizing the Ender 3’s performance. Proper storage and handling also maintain filament quality, ensuring consistent results in every project.
Understanding 3D Printing Filaments
Filaments are the lifeblood of 3D printing, with materials like PLA, ABS, and PETG offering unique properties. Each type is tailored for specific applications, ensuring versatility and quality in prints.
2.1 Types of Filaments (PLA, ABS, PETG, etc.)
PLA, ABS, and PETG are the most common 3D printing filaments. PLA is biodegradable and easy to print, ideal for beginners; ABS is durable and impact-resistant, often used for functional parts. PETG combines strength with flexibility, making it suitable for both prototypes and everyday items. Other filaments include TPU for flexibility and Nylon for high-strength applications. Each material offers distinct properties, catering to various project needs and printer capabilities.
2.2 Properties of Different Filaments
Different filaments exhibit unique properties that influence their performance. PLA is brittle but prints with minimal warping, making it ideal for detailed models. ABS is strong and heat-resistant but requires higher temperatures and may warp. PETG offers a balance of strength, flexibility, and low warping, making it versatile for various projects. TPU is highly flexible, suitable for wearables and elastic parts, while Nylon excels in durability and chemical resistance. Each filament’s thermal stability, flexibility, and moisture absorption vary, impacting their suitability for specific applications and printing conditions.
2.3 Choosing the Right Filament for Your Project
Selecting the appropriate filament for your project involves considering factors like durability, flexibility, and environmental conditions. PLA is ideal for detailed models due to its low warping and ease of printing. PETG offers a balance of strength and flexibility, making it versatile for various applications. ABS is suitable for high-strength, heat-resistant parts but requires higher temperatures. TPU is perfect for flexible items, while Nylon excels in durability and chemical resistance. Assessing the project’s requirements and matching them with filament properties ensures optimal results. Always consider storage and cost to maximize performance and value.

Ender 3 Filament Compatibility
The Ender 3 supports various filaments, including PLA, PETG, and ABS, with optimal printing at moderate temperatures. Upgrades like direct drive can expand filament compatibility further.
The Ender 3 is compatible with a wide range of filaments, including PLA, ABS, PETG, and TPU. PLA is ideal for beginners due to its ease of use and minimal warping. ABS offers higher durability but requires a heated bed. PETG combines strength and flexibility, making it suitable for functional parts. TPU is perfect for flexible prints, like wearables or belts. Each filament type has specific temperature requirements, ensuring optimal printing results when settings are adjusted accordingly.
3.2 Recommended Filament Brands for Ender 3
3.1 Compatible Filament Types for Ender 3
The Ender 3 supports various filament types, including PLA, ABS, PETG, and TPU. PLA is the most beginner-friendly option, offering easy printing and minimal warping. ABS is durable but requires a heated bed. PETG balances strength and flexibility, making it ideal for functional parts. TPU is perfect for flexible prints, such as wearables or belts. Each filament type has specific temperature and bed requirements, ensuring optimal performance when settings are properly configured.

Temperature Settings for Ender 3 Filaments
Optimal temperature settings are crucial for smooth printing. The Ender 3 typically requires a hotend temperature of 200-220°C and a bed temperature of 50-60°C for PLA.
4.1 Optimal Hotend and Bed Temperatures
For the Ender 3, optimal hotend temperatures range from 200-220°C for PLA and 230-240°C for PETG. Bed temperatures typically range from 50-60°C for PLA and 60-70°C for PETG. ABS may require higher bed temperatures, around 100°C, to prevent warping. These settings ensure proper adhesion and flow of filament. However, temperatures can vary slightly depending on filament quality and environmental conditions. Always refer to the filament manufacturer’s guidelines for specific recommendations and adjust as needed for optimal printing results.
4.2 Adjusting Temperature Settings for Different Filaments
Temperature settings vary depending on the filament type. PLA typically requires a hotend temperature of 200-220°C and a bed temperature of 50-60°C. PETG needs slightly higher temperatures, around 220-240°C for the hotend and 60-70°C for the bed. ABS filaments require higher bed temperatures, often around 100°C, to prevent warping. Always start with the manufacturer’s recommended settings and adjust based on print quality. If stringing occurs, reduce the hotend temperature by 5°C. For adhesion issues, increase the bed temperature slightly. Monitor and fine-tune these settings for optimal results with your Ender 3 printer.

Loading and Unloading Filament on Ender 3
Properly loading and unloading filament ensures smooth printing. Preheat the hotend, insert filament through the extruder, and gently push until it extrudes. For unloading, preheat, remove filament, and let the printer cool before handling.
5.1 Step-by-Step Guide to Loading Filament
- Preheat the hotend to the recommended temperature for your filament type (e.g., 200°C for PLA).
- Locate the extruder and feed the filament through the top of the extruder mechanism.
- Gently push the filament downward until it reaches the hotend and begins to extrude.
- Once the filament flows consistently, stop the extrusion process.
- Secure the filament by closing the extruder lever or adjusting the tension if necessary.
- Ensure the filament is properly seated and ready for printing by observing a small extrusion test.
5.2 Properly Unloading Filament
To unload filament from your Ender 3, start by preheating the hotend to the recommended temperature for your filament type, typically around 200°C for PLA. Open the extruder lever to release the filament from the extruder’s grip. Gently pull the filament upward to remove it from the hotend. If resistance is felt, you may need to manually extrude a small amount backward using the printer’s control panel to aid removal. After unloading, allow the hotend to cool before turning off the printer. Store the filament in a dry, sealed bag to prevent moisture absorption, ensuring optimal quality for future prints.

Troubleshooting Common Filament Issues
Address common filament issues like jams, oozing, or layer shifting by adjusting temperatures, cleaning the extruder, and ensuring proper filament storage. Regular maintenance and calibration prevent most problems.
6.1 Fixing Filament Jamming and Clogging
Filament jams and clogs are common issues that can disrupt printing. To fix them, heat the hotend to around 140°C, insert PLA filament, and push it through gently. If the blockage persists, remove the filament and clean the extruder with a small brush or drill bit. Regularly maintaining the extruder and ensuring proper filament storage can prevent such issues. For severe clogs, consider using a cleaning filament or performing a cold pull to remove debris.
6.2 Solving Stringing and Oozing Problems
Stringing and oozing are common issues caused by excess filament being extruded during printing. To address this, adjust the retraction settings in your slicer software. Increase the retraction distance and speed to prevent filament from oozing during travel moves. Lowering the nozzle temperature slightly can also help reduce stringing. Additionally, ensure proper bed leveling and Z-offset calibration to avoid excessive material flow. Using coasting or combing settings in your slicer can further minimize these issues. Regular maintenance of the extruder and idler pulley ensures optimal performance.
Maintaining Filament Quality and Storage
Properly store filament in airtight containers with silica gel to prevent moisture absorption. Keep it away from direct sunlight and dust to maintain quality and print performance.
7.1 Best Practices for Storing Filament
Store filament in airtight containers with silica gel to absorb moisture. Keep it away from direct sunlight, dust, and high humidity. Use vacuum-sealed bags for optimal protection. Label each spool with its type and color for easy identification. Store in a cool, dry place, ideally between 15°C and 25°C. Avoid exposing filament to air for extended periods. Regularly check for moisture absorption and replace silica gel as needed. Proper storage ensures consistent print quality and prevents filament degradation over time.
7.2 Preventing Moisture Absorption
Maintain filament dryness by storing it in airtight containers with silica gel packets to absorb moisture. Use vacuum-sealed bags for added protection. Keep filament away from humid environments and direct sunlight. If filament becomes damp, dry it in a low-temperature oven (around 50°C) for a few hours. Regularly inspect filament for signs of moisture, such as brittleness or discoloration. Proper prevention ensures consistent printing quality and prevents issues like stringing or oozing during prints.
Advanced Filament Settings and Upgrades
Explore advanced settings like retraction and Z-offset for smoother prints. Upgrade to a direct drive system for better flexibility with various filaments and improved print quality.
8.1 Adjusting Retraction Settings
Adjusting retraction settings is crucial for minimizing stringing and oozing. Increase retraction distance for flexible filaments and decrease for brittle ones. Optimal retraction speed varies by filament type, ensuring smooth extrusion. Proper retraction z-lift prevents adhesion issues. Fine-tune these settings in your slicer software for improved print quality. Experiment with test prints to find the ideal balance for your specific filament and printer setup. Accurate retraction settings enhance layer adhesion and overall print aesthetics.
8.2 Upgrading to a Direct Drive System
Upgrading your Ender 3 to a direct drive system enhances filament handling and print quality. This modification reduces retraction issues and improves compatibility with flexible filaments. Install a direct drive kit, ensuring proper alignment and adjustment. Configure your slicer settings for direct drive operation, focusing on retraction distance and speed. Calibration is essential for optimal performance. A direct drive system minimizes oozing and stringing, delivering smoother extrusion and better layer adhesion. This upgrade is particularly beneficial for printing with PETG, TPU, and other flexible materials, ensuring consistent results.
This guide provides a comprehensive overview of optimizing filament usage for the Ender 3, covering selection, settings, and troubleshooting. Proper storage and maintenance ensure consistent results.
9.1 Summary of Key Points
The Ender 3 Filament Guide emphasizes selecting the right filament for your project, ensuring proper temperature settings, and mastering loading/unloading techniques. Regular maintenance, such as preventing moisture absorption and addressing jams, is crucial for consistent results. Troubleshooting common issues like stringing and clogging can significantly improve print quality. Exploring advanced settings, like retraction adjustments, and upgrades, such as a direct drive system, can further enhance your printing experience. By following these guidelines, you can optimize filament performance and achieve professional-grade prints with your Ender 3.
9.2 Final Tips for Optimal Filament Usage
To maximize your Ender 3’s performance, always store filament in a dry environment to prevent moisture absorption. Use high-quality filament from trusted brands for consistent results. Regularly clean the hotend and extruder to avoid clogs. Adjust retraction settings based on filament type to minimize stringing. Experiment with bed and hotend temperatures to find the ideal balance for your prints. Lastly, keep your printer well-maintained and calibrated for optimal filament flow and print quality. Happy printing!

