Tie-dye is a vibrant, creative technique that involves folding and binding fabric to create unique patterns․ It’s a fun, accessible craft for all skill levels, producing one-of-a-kind designs that never go out of style․ With its rich history and modern adaptations, tie-dye continues to inspire artists and crafters worldwide, offering endless possibilities for self-expression through color and texture․ Perfect for DIY enthusiasts, tie-dye is a rewarding project that combines artistry with practicality, making it a timeless favorite in fashion and home decor․
What is Tie-Dye?
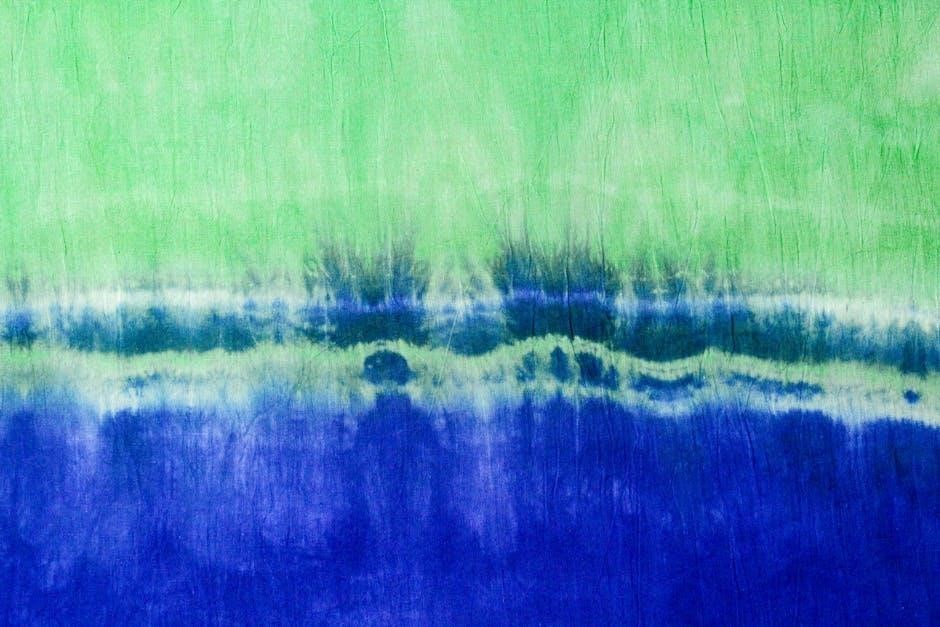
Tie-dye is a resist-dyeing technique where fabric is folded, twisted, or pleated and bound before dyeing․ This process creates unique, intricate patterns as the dye penetrates unevenly, resulting in vibrant, one-of-a-kind designs․ It’s a versatile craft that works on various fabrics, offering endless creative possibilities for fashion and home decor․
History and Popularity of Tie-Dye
Tie-dye is an ancient craft with roots in global cultures, dating back centuries․ It gained widespread popularity in the 1960s as a symbol of counterculture and creativity․ Today, it remains a beloved DIY activity, celebrated for its unique, handcrafted designs and its ability to transform ordinary fabrics into vibrant, personalized art pieces․
Benefits of Learning Tie-Dye
Learning tie-dye offers a creative outlet for self-expression and personalization․ It’s a sustainable way to upcycle old fabrics, reducing waste while creating unique pieces․ The process is meditative and fulfilling, allowing for experimentation with colors and patterns․ It’s also a fun DIY project that can be enjoyed by both kids and adults․
Preparation and Supplies
Preparation is key for successful tie-dye․ Gather essential materials like fabric, rubber bands, dye, and gloves․ Protect your workspace with plastic or old sheets to prevent stains․
Essential Tie-Dye Materials
To get started, you’ll need a few key supplies: natural fabric like cotton, rubber bands, dye powder or liquid, gloves, a bucket or container, and soda ash to fix the colors․ Protect your workspace with plastic or old sheets․ Optional items include squeeze bottles for precise dye application and string for intricate folds․ Ensure all materials are ready before beginning your project for smooth execution․
How to Prepare Fabric for Dyeing
Start by washing fabric to remove finishes․ Soak it in warm water mixed with soda ash for 6-8 hours to open fibers and enhance color absorption․ This step ensures vibrant, long-lasting results․ Gently squeeze out excess water without rinsing, and it’s ready for folding and dyeing․ Proper preparation is key for successful tie-dye․
Protecting Your Workspace
Cover your workspace with plastic sheets or newspaper to prevent stains․ Use gloves and aprons to shield skin and clothing from dye․ Contain dye messes with a contained area or drop cloth․ Clean spills immediately to avoid permanent damage․ Proper protection ensures a safe and enjoyable tie-dye experience for everyone involved․
Basic Tie-Dye Techniques
Tie-dye basics include simple folding methods like crumple, spiral, and bullseye․ These techniques create unique patterns and are perfect for beginners to explore and master creatively․
The Crumple Technique
The crumple technique is the easiest tie-dye method, perfect for beginners․ Simply scrunch the fabric randomly into a ball, secure with rubber bands, and apply dye․ This creates organic, abstract designs․ For crisper patterns, ensure tight folds and even dye distribution․ Ideal for achieving unique, chaotic effects with minimal effort․
The Spiral Method
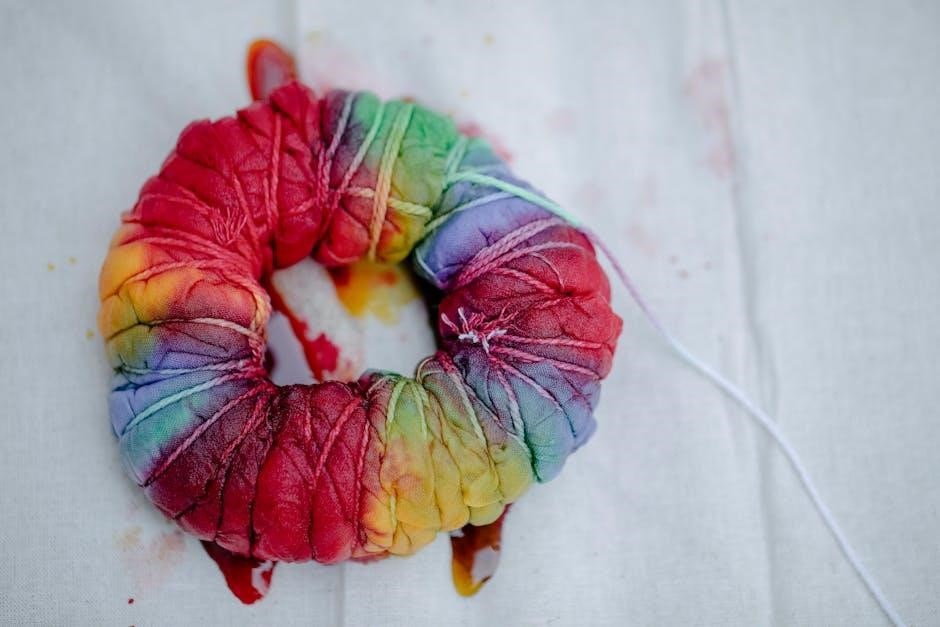
The spiral method is a popular tie-dye technique that creates stunning, symmetrical designs․ Start by folding the fabric into a spiral pattern, beginning at the center․ Secure with rubber bands to resist dye penetration․ Apply dye to achieve vibrant, swirling colors․ This method is perfect for creating bold, eye-catching designs with a professional finish․
The Bullseye Fold
The bullseye fold creates a striking circular pattern․ Fold the fabric into concentric circles, starting from the center․ Secure with rubber bands to form distinct rings․ When dyed, this technique produces a vibrant, symmetrical bullseye design, perfect for shirts or other fabrics, offering a classic tie-dye look with bold, defined rings․
Advanced Folding Techniques
Explore intricate designs with advanced folding methods like accordion folds for stripes, V-folds for angled patterns, and shibori techniques for textured, geometric shapes, adding complexity to your tie-dye creations․
Accordion Fold for Stripes
The accordion fold creates striking stripe patterns by folding fabric into precise, evenly spaced pleats․ This technique involves laying the fabric flat, making parallel folds, and securing with rubber bands․ When dyed, the folds resist color, resulting in clean, linear stripes․ Ideal for creating modern, graphic designs, it’s a favorite among tie-dye enthusiasts․
V-Fold for Unique Designs
The V-fold technique involves folding fabric in half diagonally to create a “V” shape, then applying dye perpendicularly to the fold․ This method produces angled, stripe-like patterns on both sides of the fabric․ It’s ideal for creating asymmetric designs and adds a modern twist to traditional tie-dye art, ensuring unique visual effects․
Shibori Techniques
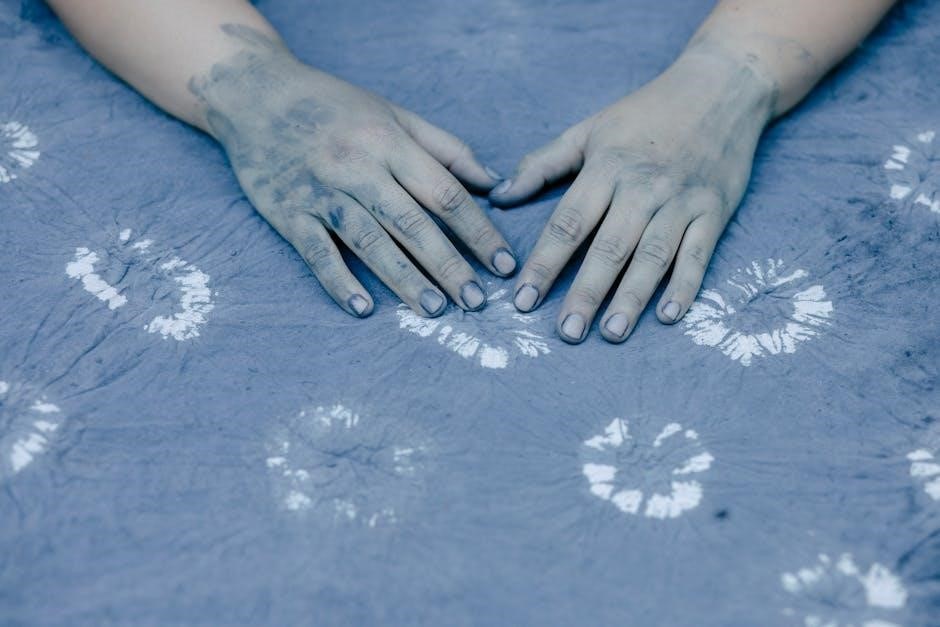
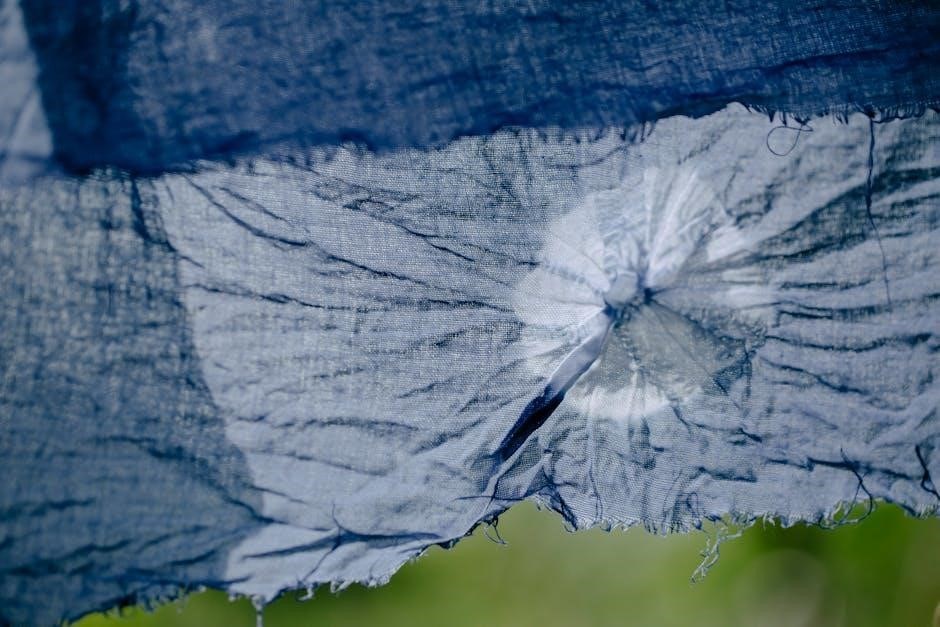
Shibori is an ancient Japanese technique involving folding, twisting, or pleating fabric and binding it with threads or sticks to create resistance areas․ This method produces intricate geometric patterns, organic shapes, and natural designs․ Shibori allows for precise control over the dye process, creating unique, textured effects that elevate tie-dye artistry to new levels․
Applying the Dye
Applying the dye involves pouring, squeezing, or ice-dyeing techniques․ These methods allow for vibrant color distribution, bringing your folded design to life with unique patterns and effects․
How to Mix Dye
Mixing dye requires precise measurements and safety precautions․ Start by dissolving dye powder in hot water, then add to a larger container of warm water․ Use gloves to protect skin and ensure the mixture is well-stirred for even color distribution․ Follow kit instructions or recipes for optimal results and vibrant hues․
Techniques for Applying Dye
Apply dye by pouring, squeezing, or brushing it onto the folded fabric․ Use squeeze bottles for precise control or sponges for softer blends․ Ensure even saturation by gently pressing the dye into folds․ For vibrant results, allow the dye to set before rinsing, following the recommended time on your dye instructions․
Using Ice for Ice-Dyeing
Ice-dyeing involves placing ice on folded fabric, allowing it to melt and infuse colors․ This method creates unique, organic patterns as the dye seeps unevenly․ Use powdered dye mixed with ice for vibrant effects․ The slow melting process ensures unpredictable, yet stunning, color distributions that add an extra layer of creativity to your tie-dye projects․
Common Tie-Dye Patterns
Tie-dye offers various popular patterns like spiral, crumple, stripes, and polka dots․ Galaxy designs are also trendy, creating unique and visually appealing effects․ Perfect for crafting and fashion, these patterns inspire creativity and individuality in every project․
Galaxy Patterns
Galaxy patterns are a stunning tie-dye variation, achieved by crumpling fabric along a central line; Apply the lightest dye at the center, gradating to darker shades outward․ This technique creates a cosmic, multi-color effect, perfect for unique and eye-catching designs․ Ideal for beginners, it offers a modern twist on classic tie-dye artistry․
Stripe Patterns
Stripe patterns are a classic tie-dye design, created by folding fabric into straight, even sections․ Use rubber bands to secure the folds, then apply different dye colors to each stripe․ This technique works well on towels or shirts, offering a bold, multi-color effect that’s both stylish and easy to achieve for all skill levels․
Polka Dot and Circle Patterns
Polka dot and circle patterns are achieved by binding small sections of fabric into tight circles or dots using rubber bands or marbles․ Dye applied to these areas creates distinct, rounded shapes․ This technique allows for playful, whimsical designs, with varying dot sizes and colors adding visual interest to your tie-dye project․
Troubleshooting Common Issues
Address uneven dye distribution by ensuring proper folding and dye saturation․ Prevent color bleeding by using high-quality dyes and following washing instructions carefully․ Fix fold imperfections by adjusting bindings before dyeing for crisp, clean results every time․
Fixing Uneven Dye Distribution
To fix uneven dye distribution, ensure fabric folds are tight and consistent․ Use high-quality dyes and apply evenly․ Avoid over-saturating, as this can lead to color pooling․ Gently massage dye into folds for uniform absorption․ If necessary, rewash or reapply dye to achieve desired results․ Proper preparation and technique are key to balanced patterns․
Preventing Color Bleeding
To prevent color bleeding, wash tie-dye items separately in cold water and use a color-catching sheet․ Add vinegar to the wash to set colors․ Avoid hot water and harsh detergents․ Allow dyed fabric to cure for 24 hours before washing․ This helps lock in colors and reduces bleeding, ensuring vibrant, long-lasting designs․
Resolving Fold Imperfections
If folds are uneven, gently adjust before dyeing․ Use rubber bands tightly to prevent loose areas․ After dyeing, steam or iron the fabric to smooth wrinkles․ Minor imperfections can add character, but for a cleaner look, ensure folds are precise and evenly bound․ This helps achieve sharp, defined patterns․
Caring for Tie-Dye Items
Proper care ensures tie-dye items remain vibrant․ Wash inside out in cold water with mild detergent․ Avoid bleach and hot water․ Air dry to prevent fading and maintain colors․
Washing and Drying Instructions
To preserve tie-dye colors, wash items inside out in cold water using mild detergent․ Avoid bleach or harsh chemicals․ Gently agitate and rinse thoroughly․ Air dry away from direct sunlight to prevent fading․ Never dry clean or iron tie-dye fabrics, as heat can damage the dyes and fabric integrity․
Maintaining Color Vibrancy
Maintaining Color Vibrancy
To keep tie-dye colors vibrant, wash items in cold water with mild detergent and avoid bleach․ Turn garments inside out before washing to reduce friction fading․ Air dry away from direct sunlight, as UV rays can dull colors․ For extra protection, use color-protecting shampoos or add vinegar to the rinse cycle․
Long-Term Care Tips
For long-lasting tie-dye results, store items in a cool, dry place away from direct sunlight․ Avoid harsh detergents and fabric softeners, as they can degrade colors․ Fold rather than hang to prevent stretching and creases․ Regularly cleaning and storing properly ensures your tie-dye creations remain vibrant and intact for years․

Creative Variations and Projects
Explore unique tie-dye projects like vibrant socks, scarves, and seasonal-themed items․ Combine tie-dye with embroidery or appliqué for dazzling results․ Create personalized gifts or upcycle old fabrics into stunning designs, adding a creative twist to everyday items with bold, colorful patterns and innovative techniques․
Tie-Dye Socks and Accessories
Tie-dye socks and accessories are a fun way to add personality to your wardrobe․ Use rubber bands to create patterns, fold fabric into spirals for unique designs, and apply vibrant dyes; For a modern look, try ice-dyeing for softer, watercolor effects․ Experiment with color combinations like purple and green for eye-catching results․ Perfect for DIY enthusiasts, these small projects make great personalized gifts or upcycled items․
Seasonal and Themed Tie-Dye
Create festive tie-dye designs for holidays or special occasions․ Use seasonal colors like red and green for Christmas or pastels for Easter․ Themed patterns, such as beach-inspired spirals for summer or spooky motifs for Halloween, add a personal touch․ Customize your projects to match any celebration or theme for unique, eye-catching results․
Combining Tie-Dye with Other Crafts
Enhance your tie-dye projects by incorporating other crafts like embroidery, quilting, or upcycling․ Add intricate stitching to dyed fabrics or blend tie-dye with patchwork for unique quilts․ Experiment with combining tie-dye patterns with appliqué or beadwork for textured designs․ This fusion of techniques creates visually striking, one-of-a-kind pieces that showcase creativity and skill․
Congratulations! You’ve completed the tie-dye guide․ For more inspiration, visit Dye DIY or explore tutorials on YouTube․ Happy dyeing and crafting!
Final Tips for Success
For a successful tie-dye project, always use high-quality dyes and protect your workspace․ Experiment with folds and colors to achieve unique designs․ Be patient during the dyeing process and follow washing instructions carefully․ Practice makes perfect—don’t be afraid to try new techniques and have fun creating!
Recommended Reading and Tutorials
Explore comprehensive guides on websites like dyediy․com for detailed tie-dye tutorials and step-by-step instructions․ These resources cover basic techniques, advanced folding methods, and troubleshooting tips․ Perfect for both beginners and experienced crafters, they offer inspiration and practical advice to enhance your tie-dye projects and achieve professional results․
Encouragement to Experiment
Embrace creativity and try new techniques—tie-dye is all about artistic freedom! Experiment with unique folds, vibrant colors, and bold patterns to create one-of-a-kind designs․ Don’t fear mistakes; they often lead to stunning, unexpected results․ Share your creations and inspire others to join the tie-dye journey for endless fun and self-expression․